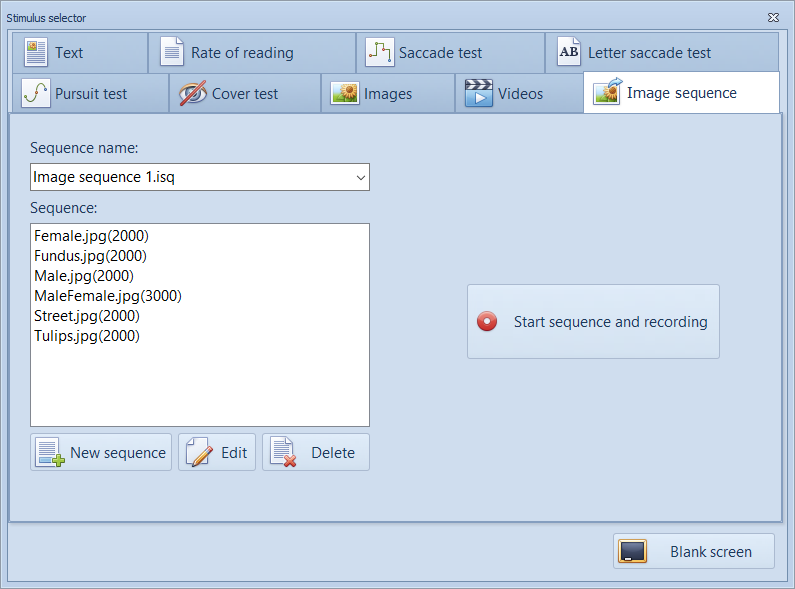
Image sequence
The Image sequence category allows a series of images to be shown and the presentation time for each image can be varied. This allows users to create a test protocol and a single recording to be made with multiple images. For example, text could be displayed with various coloured backgrounds.
Playback is synchronised with the image sequence so the image will automatically change at the correct time.
Creating a new sequence:
To create a new sequence, select New sequence. This will display the Add new sequence dialog window as shown below.
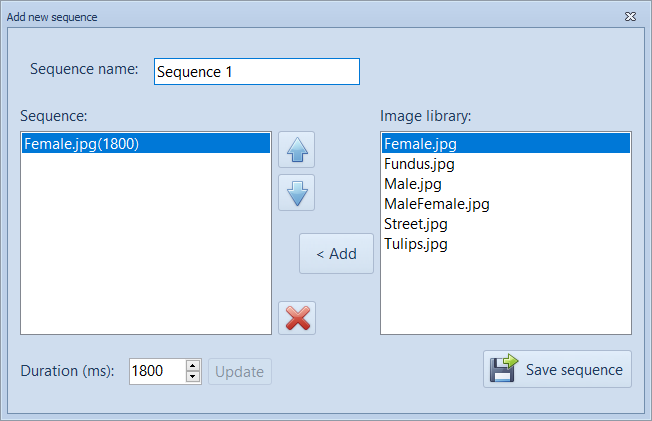
Give the sequence a name- e.g. Sequence 1 above.
Select the first image that you wish to add to the sequence from the Image library list. New images can be added to this library from the Images tab. Select the duration (ms) that you wish to display the image using the Up/Down control labeled Duration. Add the image to the sequence by selecting <Add.
Repeat this process until you have added all the required images to the sequence as shown below.
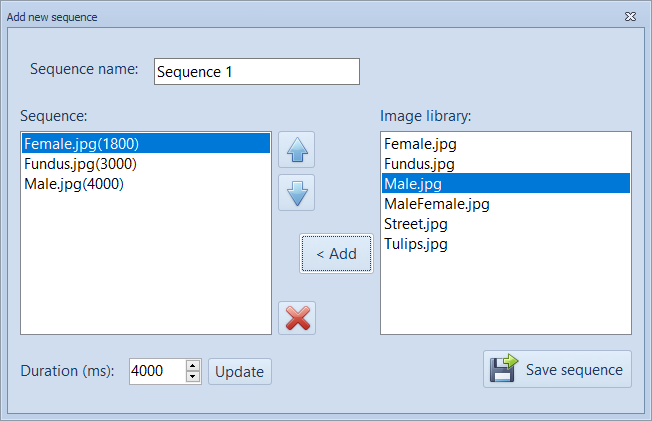
The order of the sequence can be changed, by selecting an image in the sequence and moving it up or down the list using the arrows. The duration of presentation can be changed by selecting the image in the sequence, changing the duration and then selecting Update.
When the sequence is complete, select Save sequence.
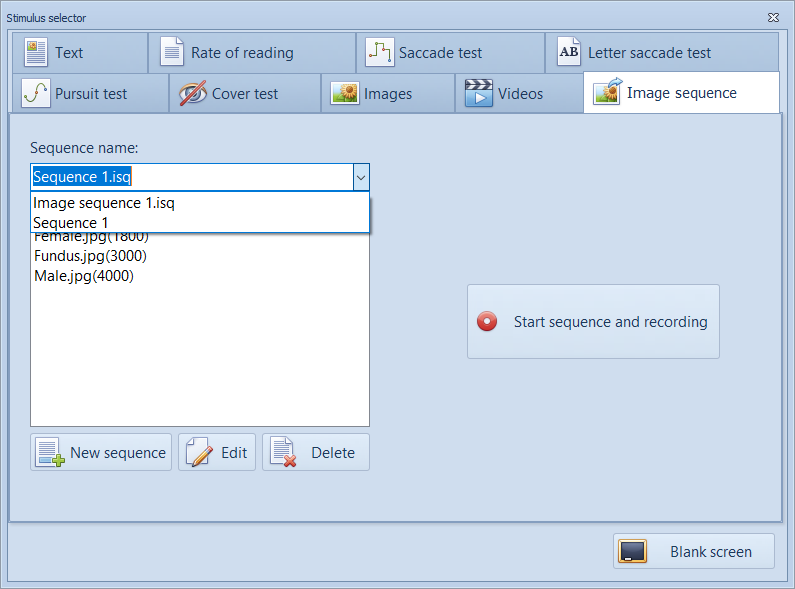
The new sequence will now appear in the pull-down list as shown below:
To run the sequence, select Start sequence and recording. Record will be selected automatically and the sequence will be run. The Save dialog will be shown automatically at the end of the sequence.
The images in the sequence will be shown automatically during playback of the recording.