The phoropter control can be displayed on a tablet allowing the practitioner to perform a refraction without being tied to a computer.
Details of how to link a tablet to a PC.
Having connected the tablet and PC, ensure that Enable tablet is ticked under the Windows positioning tab of the Program Options window.
If Enable tablet is selected and the Phoropter module is enabled, the Floating Control window will include a Phoropter button on the Tablet toolbar at the bottom of the screen. To display the phoropter interface on the tablet screen, select the Phoropter button.
This will display the Phoropter interface on the tablet screen as shown below:
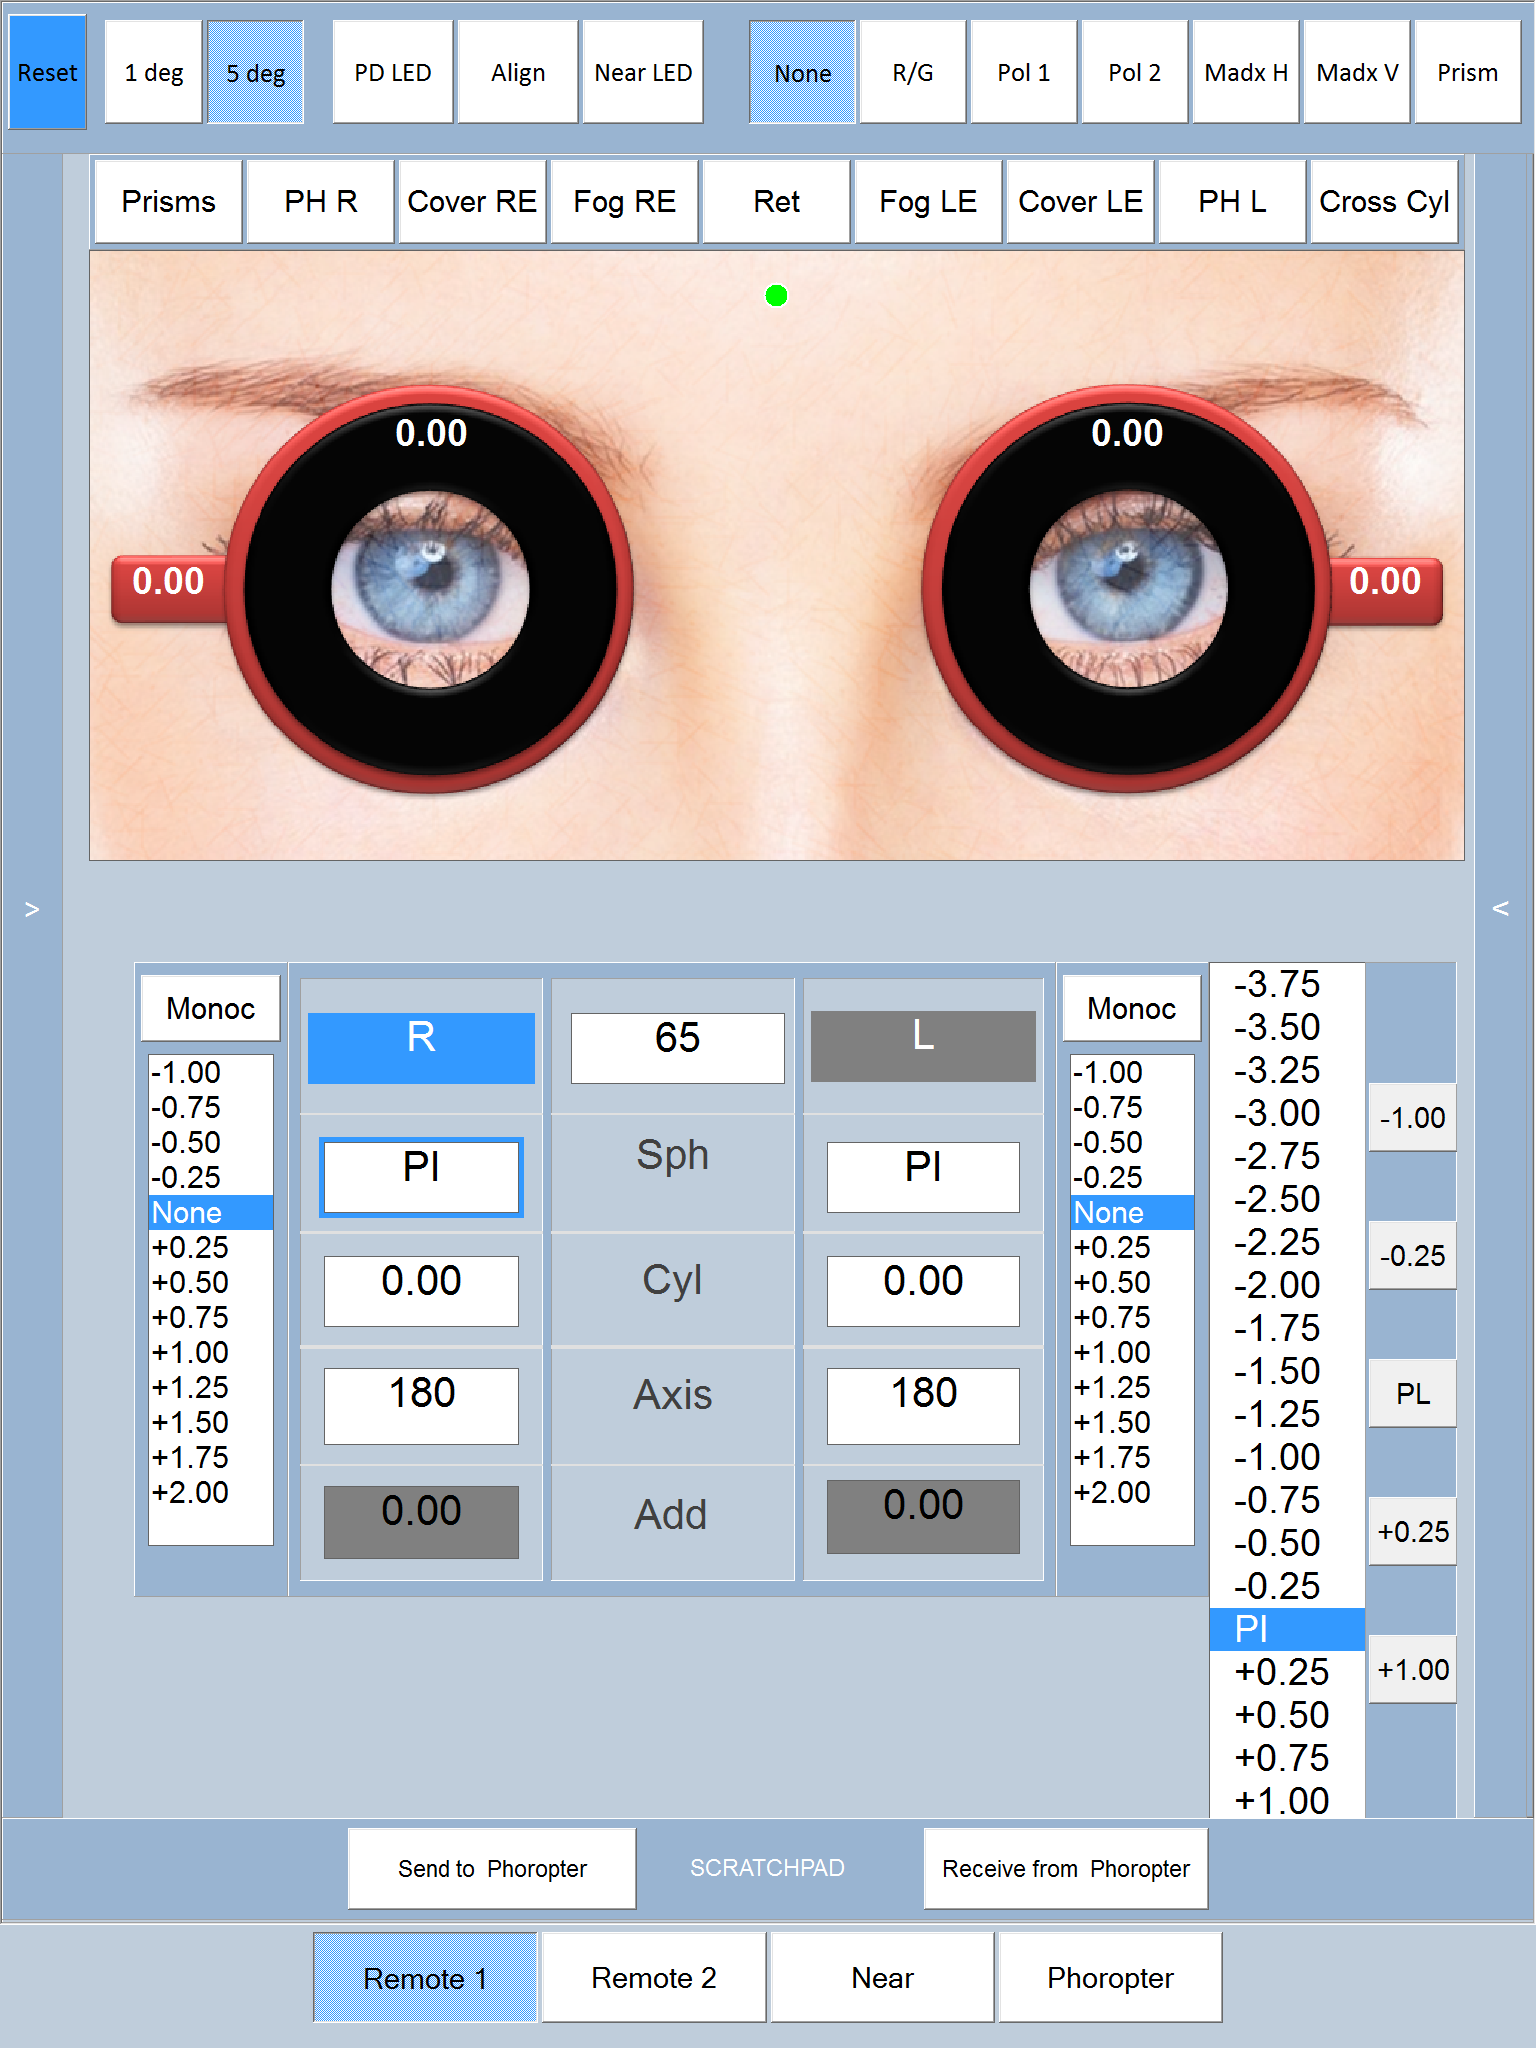
The interface has the same functionality as that displayed on the Floating Control window. However, a number of features have been changed to facilitate touch rather than mouse control. In particular, a scrolling list is displayed on the right hand of the interface. This is automatically populated with appropriate values depending on whether Sph, Cyl, Axis or Add is selected. The user simply taps on the required lens power or axis and this value is entered into the selected field.
Various buttons are also shown next to the scrolling list (-1.00, -0.5, Pl, +0.25, +1.00 when sphere is selected). These buttons allow the lens to be changed in corresponding increments or reset to Plano. This interface has proved to be intuitive and very responsive.
All other buttons and panels are the same as described for the Phoropter interface shown in the Floating Control window.
The Phoropter interface in the Floating Control window may be shown and used simultaneously with the tablet interface. Each interface will be automatically updated when the other is changed. This allows the practitioner to alternate between the two.