Running the test
The Field of Binocular Single Vision (FBSV) is the area of the visual field over which the patient can maintain single vision (bifoveal fixation).
The traditional method of measuring this is by moving a spot target from the centre of the field outwards along a series of radial lines and recording the eccentricity at which the patient reports that the target goes doubled. This can be done using a pen torch but more accurate quantification is obtained using an arc perimeter or bowl perimeter.
However, manual arc and bowl perimeters are somewhat cumbersome to use and are rapidly becoming obsolete. The BV Analyser adopts the same principle accept the stimulus is moved across a large computer screen/TV screen. This allows for more precise control of the target and minimises recording errors.
Single and Multiple Diplopia points
The FBSV test has two test modes:
Single Diplopia points
This mode is suitable for patients who have single vision in the central field and a single point along each radial at which vision becomes doubled. In other words, there is a single island of single vision which incorporates the centre of the field.
Multiple Diplopia points
This mode is suitable for patients who have more than one "island" of single vision / diplopia in the field. For example, vision may be doubled in the central field and become single at certain points in the peripheral field.
In this mode, multiple diplopia points may be recorded along each radial.
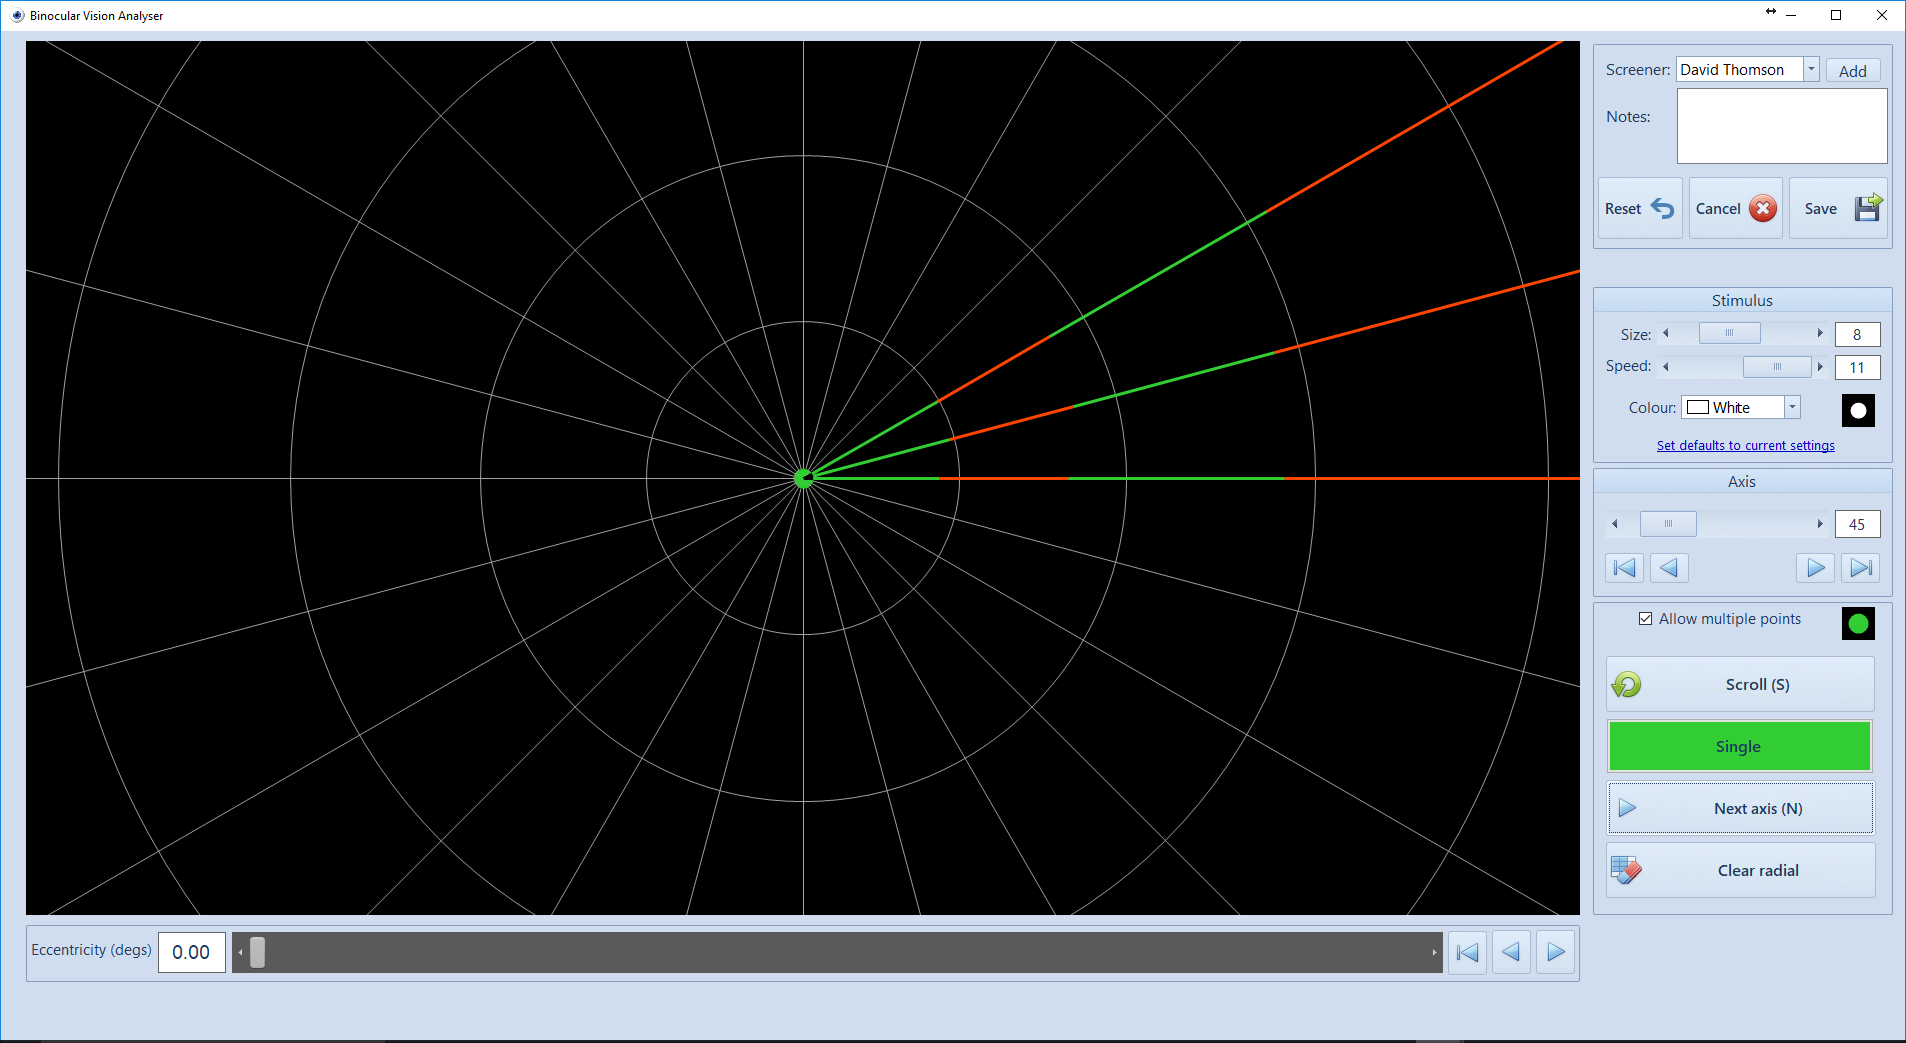
Running the test: Single Diplopia points
To run the test in Single Diplopia points mode, ensure that Allow multiple points is not checked.
- The patient is positioned in front of the Patient screen with their head restrained by a forehead/chin rest.
- A suitable target is selected and the examiner select Scroll (S on keyboard)
- The target is then automatically moved from the centre of the screen toward the periphery in a series of radial lines at 15 degree intervals. The patient is instructed to keep their head still and follow the spot with their eyes and report when the spot just goes doubled (if at all).
- The examiner clicks Record or presses the Space Bar when this occurs and this eccentricity is automatically recorded. The spot is then automatically moved back towards the centre and is then scrolled along the next radial line. This process is repeated until all radials have been examined. To clear the results for the current radial, select Clear radial.
- To save the results, first select the name of the screener from the pull-down list and enter any notes relating to the test, then select Save. To clear all recorded results and restart the test, select Reset. To cancel the test and return to the main administration screen select Cancel.
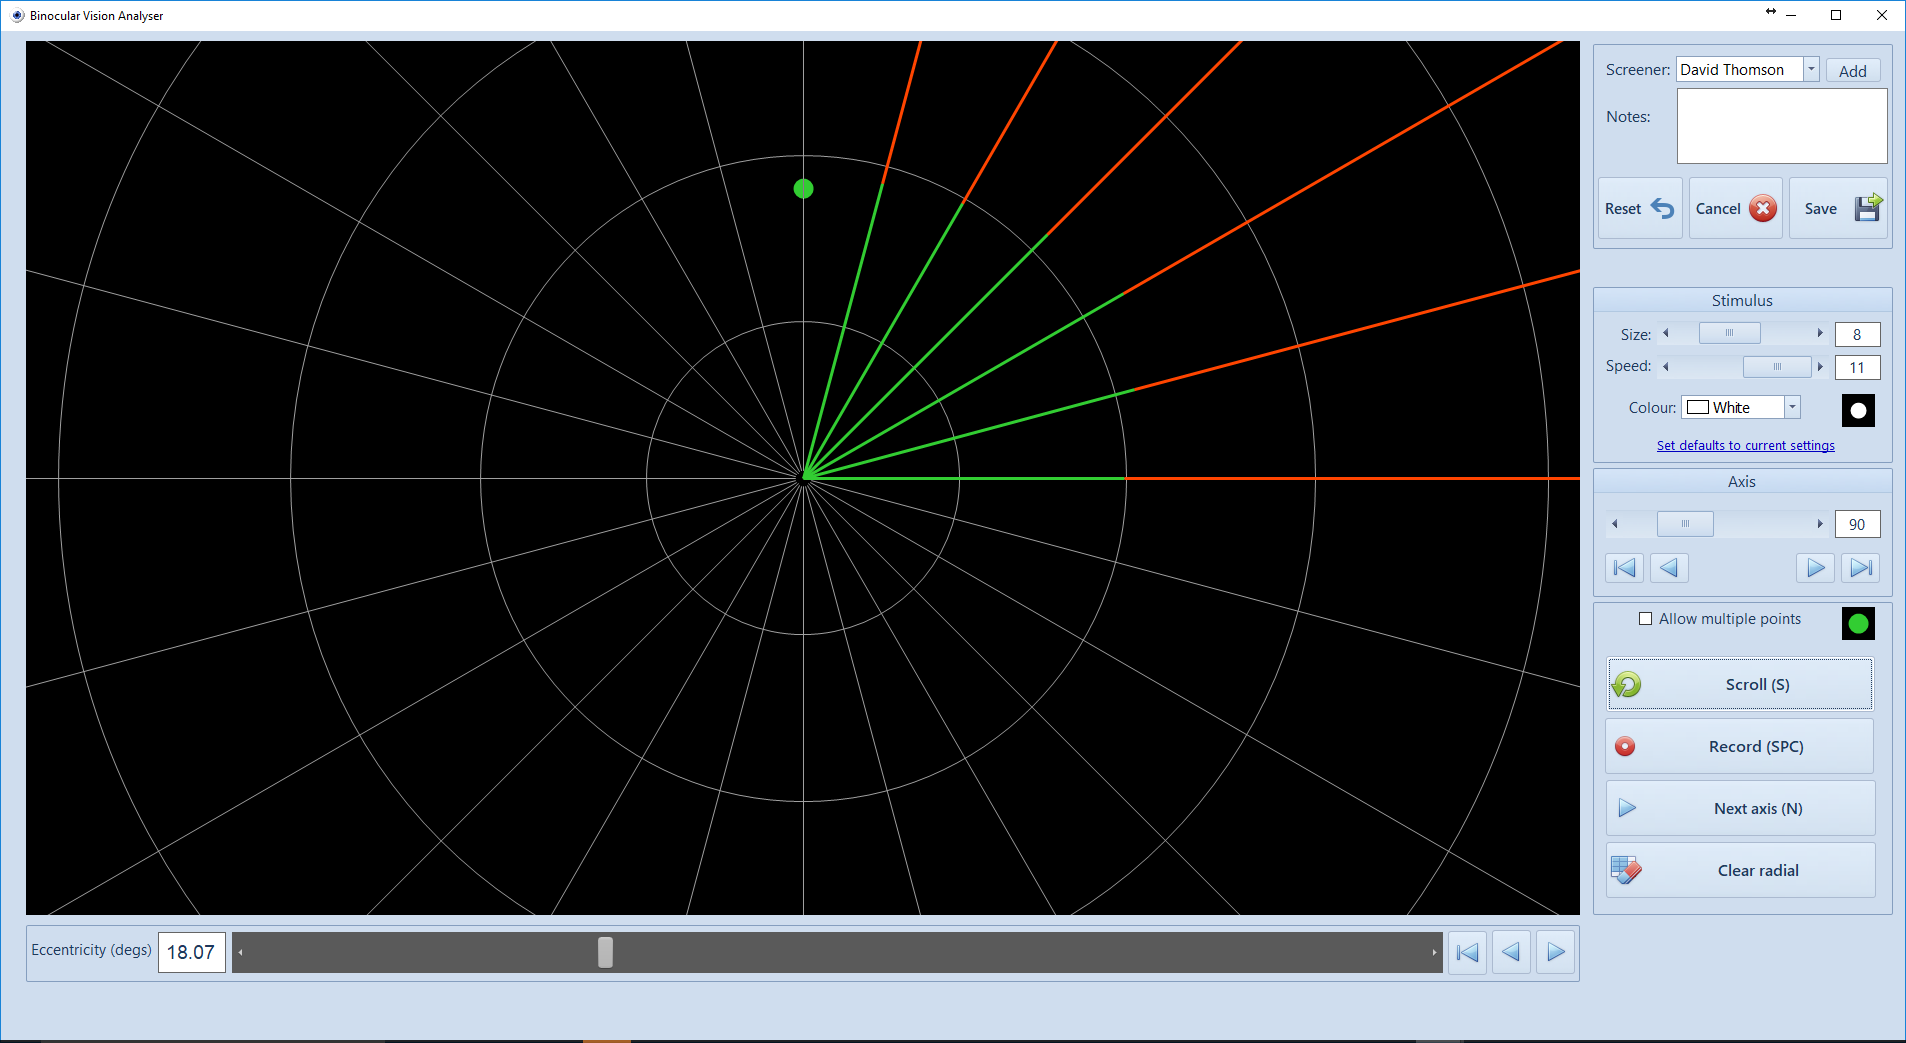
Running the test: Multiple Diplopia points
To run the test in Multiple Diplopia points mode, ensure that Allow multiple points is checked.
- The patient is positioned in front of the Patient screen with their head restrained by a forehead/chin rest.
- A suitable target is selected and the examiner selects Scroll (S on keyboard)
- The target is then automatically moved from the centre of the screen toward the periphery in a series of radial lines at 15 degree intervals. The patient is instructed to keep their head still and follow the spot with their eyes and report when the spot just goes doubled (if at all).
- The examiner clicks Double to record the eccentricity at which the patient reports a transition from single to double vision and Single to record the eccentricity at which the patient reports a transition from double to single vision. Green and Red lines will be drawn to represent the range of eccentricities over which the patient reports Single and Double vision respectively. Selecting Next axis move the target to the next radial (+15 degrees) and sets the eccentricity back to zero (centre of the screen). The process is repeated is repeated until all radials have been examined. To clear the results for the current radial, select Clear radial.
- To save the results, first select the name of the screener from the pull-down list and enter any notes relating to the test, then select Save. To clear all recorded results and restart the test, select Reset. To cancel the test and return to the main administration screen select Cancel.
Stimulus options
The size and colour of the stimulus can be changed from the Stimulus options panel. A preview of the current stimulus is displayed.
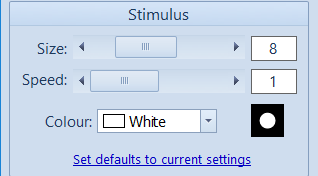
The speed that the stimulus is moved when being scrolled can be varied using the Speed scroll bar.
The default settings for stimulus size, colour and scrolling speed can be set to the current values by selecting Set defaults to current settings.
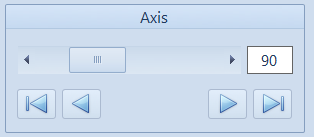
Setting the stimulus axis and eccentricity
The axis that the stimulus traverses along and the eccentricity can be readily changed using the controls in the Axis and Eccentricity panels.
Axis scroll bar: this determines the current axis along which the stimulus moves. This ranges from 0-345 degrees in 15 degree increments.
Clicking on the arrows below the scroll bar increment/decrement the axis in 15 degree intervals and reset the axis to 0 and 180 degrees.
The axis can also be selected by simply clicking on the required axis on the control screen.
Eccentricity scroll bar: this determines the current eccentricity of the stimulus (0 being the centre of the screen).
![]()
Clicking on the arrows below the scroll bar increments/decrements the eccentricity and the restart button resets the eccentricity to zero.
The Scroll button automatically increments the eccentricity. The speed of movement is determined by the Speed scroll bar described above.
The Record button records the current target eccentricity and axis.
The axis and eccentricity can also be selected by simply clicking at the corresponding point on the control screen.