Program options
To configure the software select the Settings tab at the top of the screen and select Show options. This will display the program options window shown below.
The General tab
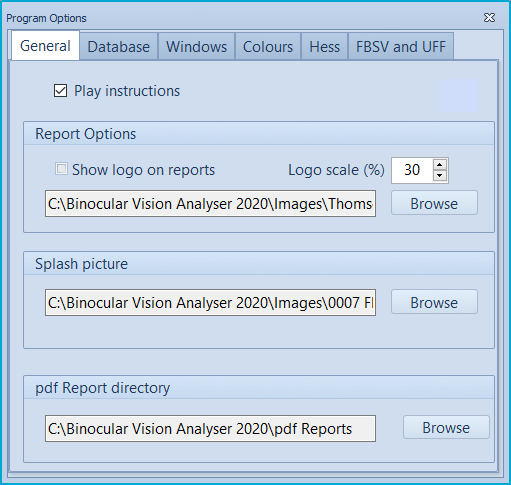
The General tab contains various report options and program options.
Report Options
Your hospital/ clinic logo can be displayed on the reports by checking the Show logo on reports check box. To add your logo, click on Browse and navigate to a jpg or png copy of your logo. The logo will be scaled automatically but the precise size can be varied using the Logo scale option.
Splash picture
A splash picture is displayed on the patient's screen before and after the test. This may be a photograph or an image showing the name and logo of the clinic.
The image may be in jpg or png format and for best results, should have the same resolution as the screen (e.g. 1920 x 1080). To select the image, click on Browse and navigate to the required image.
pdf Report directory
The Binocular Vision Analyser allows a pdf copy of all reports to be saved at the click of a button. This allows reports to be shared across a department or readily attached to patient records. The default location for saving the pdf reports is specified by selecting Browse and selecting the default directory.
The Database tab
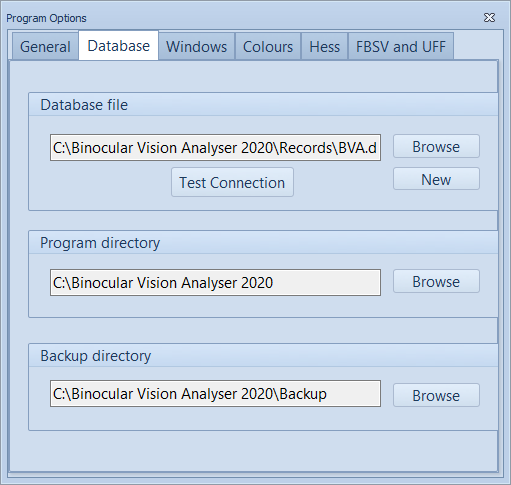
Database file
The Binocular Vision Analyser incorporates a powerful MySQL database to record records and results.
To select an existing database, select Browse in the Database file panel and navigate to the database file. To check the integrity of the database, select Test Connection.
To create a new database, select New in the Database file panel and select the location and name for the database file.
Program directory
The preferred directory for installing the software may be selected during the installation process. By default, this directory will include subdirectories for the various images and sound files used by the software. It is important therefore that the program directory is set correctly.
Backup directory
The software includes the facility to facilitate the backup of the database file. The drive / directory to be used for the backup can be specified by selecting Browse.
The Windows position tab
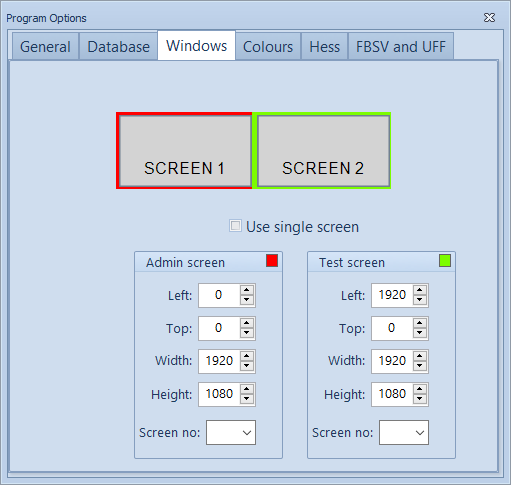
The Binocular Vision Analyser works best with two monitors - one to be viewed by the patient (Test screen) and the other for controlling the tests (Admin screen).
The Windows position tab is used to size and position these two screens. The left,top, width and height for each screen may be entered manually. Alternatively, simply select the Screen no from the pull down list and the corresponding settings will be added automatically.
The Colours tab
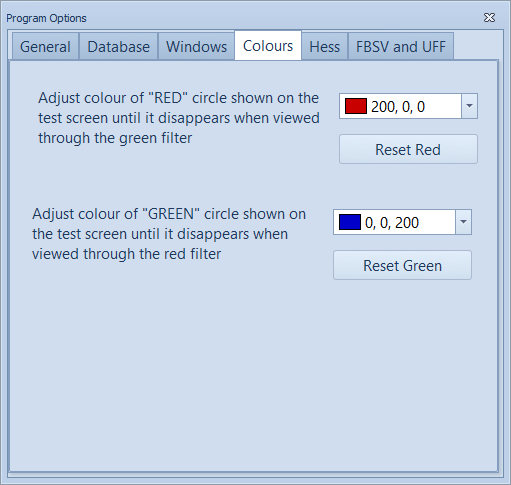
For the Hess test, the patient views "red" and "green" targets through red/green goggles. Through the red filter, the green circle should vanish and the red circle should be seen and vice versa through the green filter. Because of difference in the colour reproduction of different screens/computers, it may be necessary to "tweak" the screen colours slightly to obtain an optimum colour match with the goggles.
This can be achieved by selecting the Colours tab. This will display a "red" and "green" circle on the patients screen. Clicking on the down arrow next to the colour pickers will then display the colour picker shown below:
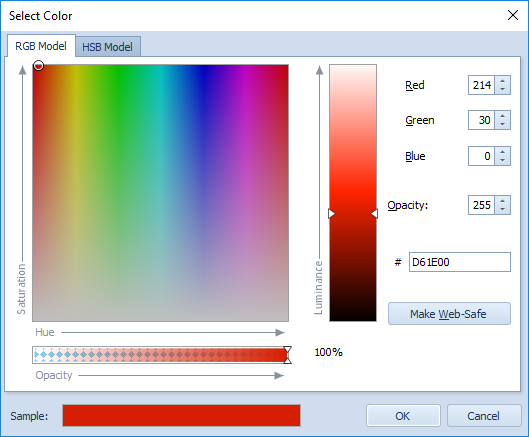
The colour can then be varied using an RGB or HSB (Hue Saturation Brightness) model. The "red" colour should be changed until the red circle displayed looks clear and bright through the red filter and completely disappears through the green filter.
This process should be repeated for the "green" colour until the green circle displayed looks clear and bright through the green filter and completely disappears through the red filter.
To reset the colours to their default values, select Reset Red and Reset Green respectively.
The Hess Options tab
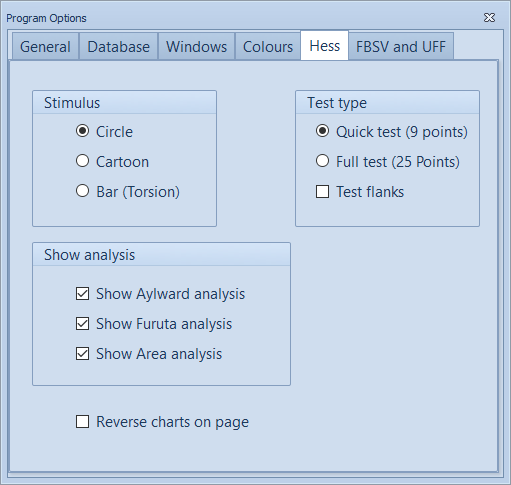
This tab sets the default configuration for the Hess test. The default stimulus can be set to a Circle, Cartoon or Bar and the default test can be set to a Quick test or Full test. Selecting the Test flanks check box adds three extra point on the left and the right on wide-screen monitors. All of these options can be changed when the test is run.
A variety of analyses can be performed on the Hess data. The results of the analyses can be displayed by default by selecting Show Aylward analysis, Show Furuta analysis and Show Area analysis respectively.
The Reverse charts on page check box is used to reverse the left and right Hess plots.
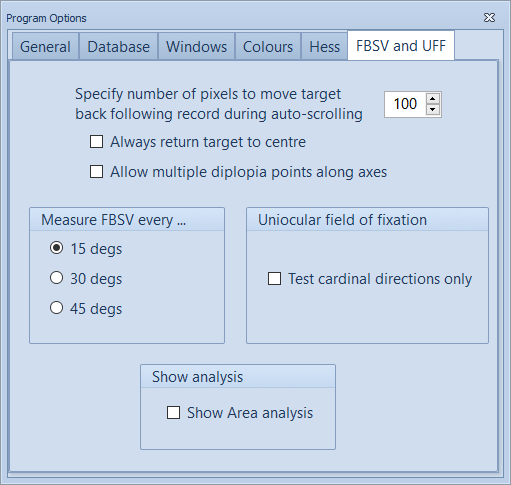
The FBSV and UFF Options tab
This tab sets the default configuration for the Field of Binocular Single Vision (FBSV) and Uniocular Field of Fixation (UFF) tests.
On recording a result with the FBSV and UFF tests, the target will automatically move to the next radial axis and move back towards the centre of the screen, ready to scroll outwards again. The offset towards the centre can be specified in pixels by changing the value for Specify number of pixels to move target back following record during auto scrolling.
If Always return target to centre is checked, the target is returned all the way to the centre of the screen. Otherwise, the target is moved from the current eccentricity towards the centre by the number of pixels specified in the Specify number of pixels to move target back following record during auto-scrolling scroll box.
The FBSV and UFF tests have two modes - Single diplopia point and Multiple diplopia point. To make Multiple diplopia point the default mode, check the Allow multiple diplopia points along axes check box. If this is not checked, Single diplopia mode will be selected by default.
In Single diplopia point mode it is assumed that the patient experiences binocular single vision in the centre of the field and diplopia at a single point at a given eccentricity along each radial. This point is recorded by clicking the Record button on the FBSV control panel. The target is then moved to the next radial (+15 degrees).
The FBSV and UFF test may be performed every 15, 30 or 45 degrees by selecting the corresponding option under Measure FBSV every ...
The UFF test can be restricted to just the Cardinal axes of the extraocular muscles by default by selecting Test cardinal directions only.
The software can automatically calculate the total area of the FBSV and UFF plots. This can be displayed on the charts by default by selecting Show Area analysis.